Introduction
This post is a tutorial on how to set up a working ROS development environment within Windows (complete with GUI support) utilizing the new Windows Subsystem for Linux 2 (WSL2). I wrote a similar post to this previously describing how to do it for WSL1 and a lot of that info carries over here. If you want to learn about why I choose to use WSL instead of a Virtual Machine (VM) or dual-booting into Linux, you can read about that in the above post.
Before we get started I’d like to point out that my previous post on this topic for WSL1 has been a major hit. That blog post gets hundreds of views per week and I’m blown away by how many people have been helped by it. I want you all to know that I really appreciate all the feedback I get and that I actively check the comments on this blog so don’t be shy and reach out with comments and questions!
NOTE #1: If you’d like to know how to set this up in Docker, I have another tutorial here that shows how to do that.
NOTE #2: You have to be running Windows 10 version 2004 (Build 19041) or higher for WSL2 to work.
WSL Installation
WSL2 is a complete reworking of WSL that shifts from what was essentially an emulation based approach to a virtualization based approach. WSL2 comes with a full Linux kernel and runs as a very lightweight VM on top of hypervisor. This gives tremendous improvements to performance over WSL1 specifically when it comes to boot times and I/O performance (we’re talking up to 20x speed improvements).
Installing and setting up WSL2 is pretty straightforward (you can see the full docs here). First, you need to enable the WSL optional feature in Windows so open up a PowerShell prompt as Administrator and run this command:
1
dism.exe /online /enable-feature /featurename:Microsoft-Windows-Subsystem-Linux /all /norestart
If we were going to use WSL1 that is all we would have to do, but to use WSL2 there are a couple extra steps. You need to enable the Virtual Machine Platform optional feature by running the below command in PowerShell as Administrator:
1
dism.exe /online /enable-feature /featurename:VirtualMachinePlatform /all /norestart
You then need to restart your machine to finish the WSL install and the upgrade to WSL2.
After the restart, we want to make sure that WSL2 is our default WSL version so that any Linux distros installed from here on out will be WSL2 (though you can always upgrade or downgrade distros later on). To set WSL2 as the default, run the below command in a PowerShell prompt:
1
wsl --set-default-version 2
After running this command, you may see this message: WSL 2 requires an update to its kernel component. For information please visit https://aka.ms/wsl2kernel. If you do, go to the link in the message and update your Linux kernel by installing the MSI that you download from that site. Once the kernel is installed, run the above command again and verify that the message doesn’t appear.
If you already have a WSL1 installation, you can upgrade it to WSL2 using the below command and just replace <distribution name> with the name of the distro you want to upgrade:
1
2
wsl --list --verbose #list wsl distros
wsl --set-version <distribution name> 2 #change a distro to WSL2
If you don’t already have Ubuntu installed through WSL1, let’s go ahead and install it now! Head over to the Microsoft Store app and search for “linux”.
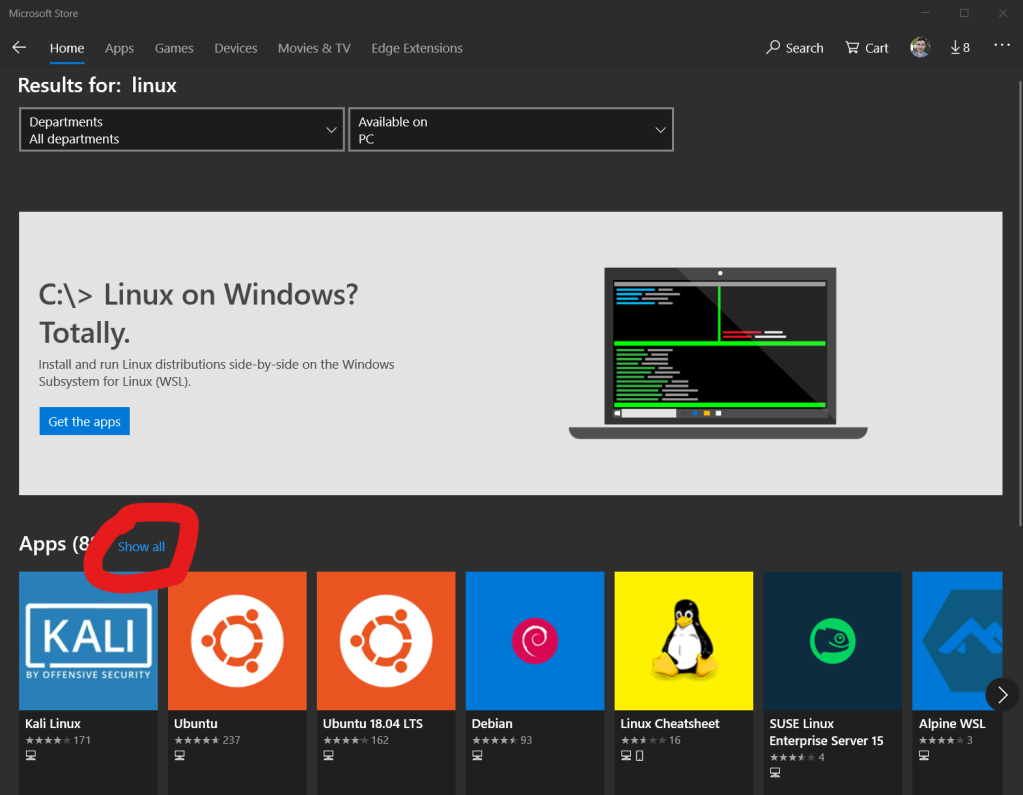
This will give you a bunch of options including Kali, Ubuntu, Debian, and others. For ROS we need Ubuntu installed and in this tutorial I will choose Ubuntu 18.04 LTS. Keep in mind that Ubuntu and ROS versions are paired with each other: e.g. 16.04/Kinetic and 18.04/Melodic. They don’t work interchangeably. So in this walkthrough I will install Ubuntu 18.04 and then later we’ll install ROS Melodic.
All that being said, simply click on your Ubuntu version of choice and then click install. This might take a bit depending on your internet speeds since the distribution is fairly large.
Now we can launch that app and it will take a bit the first time as it needs to run through the initialization of the OS (remember that we are installing a complete operating system here). However, every other boot of WSL will only take a couple of seconds.
Now you’re in! You have an (almost) fully-featured version of Ubuntu running within Windows with minimal resources being taken up and the ability to launch and kill it in a matter of seconds.
NOTE: Your WSL2 filesystem resides within your file explorer at \\wsl$\Ubuntu-18.04
Setting up GUI forwarding
There are many X-server applications that will allow for GUI forwarding from WSL2, but my favorite one is VcXsrv. Go here to download and install it.
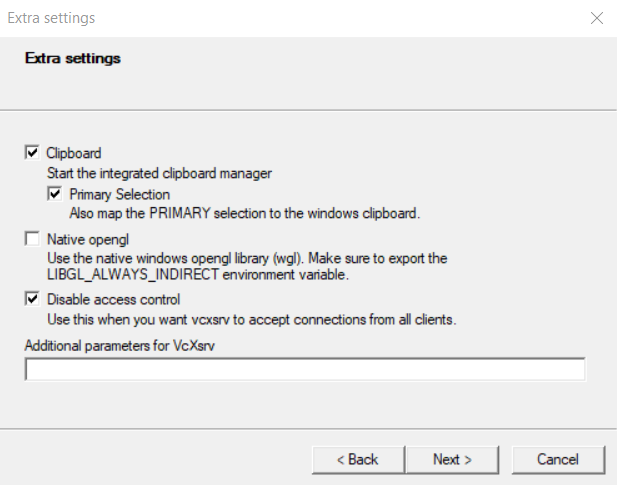
Once you run the installer you can launch it from the Start menu in order to set it up. You can choose the defaults for the display settings and how to start clients. For the extra settings make sure to uncheck “Native opengl” and to check “Disable access control”. Right before you click “finish” you can select “Save configuration” so that you can simply double-click the config file to launch VcXsrv with these custom settings. This is a bit faster than clicking through every time.
Once you click “finish” you should see the VcXsrv icon down in your icon tray which means the server is running.
NOTE: Some people have said that they run into issues with OpenGL applications like Rviz. If you do, try setting the environment variable LIBGL_ALWAYS_INDIRECT=0 in your WSL2 terminal (you can just add export LIBGL_ALWAYS_INDIRECT=0 to the end of your .bashrc file).
Once that’s set up, we need to set the DISPLAY environment variable which tells WSL2 where to send the graphics for any application that needs a display to function. To do this, you’ll need to know the IP address for the Windows host machine. You can find this by going to Settings -> Network & Internet and looking under the properties of your current connection (it will probably be labeled as “IPv4 Address”). Then run this command and replace {your_ip_address} with your IP address:
1
echo 'export DISPLAY={your_ip_address}:0.0' >> ~/.bashrc
NOTE #1: If you’re running this on a laptop then your IP address will change as you move from network to network. Also, if you’re on a larger network (at a school campus or big company) you’re IP may change from time to time. Just keep in mind that you may need to update this IP address every once in a while.
NOTE #2: You may have some issue using the IP address shown in Windows settings. If you do you may have success using the method on this StackOverflow answer. (credit to Ane for pointing this out)
Now source your edited .bashrc file:
1
source ~/.bashrc
Now everything should be setup for GUI apps to be sent on to Windows for rendering and display. If you want to test the setup, you can install some basic apps within Ubuntu with the below package:
1
2
sudo apt update
sudo apt install x11-apps
And then run:
1
xcalc
To run one of the apps. You can also install any of your favorite GUI apps or test it with ROS after we install that. Speaking of which…
ROS Installation
Now to install ROS. The ROS team has a great installation guide over here for the different ROS versions on different OSes but here we’re just going to do the steps for Ubuntu 18.04/ROS Melodic. Go here for more details.
First, make sure your version of Ubuntu has all the latest updates (all the commands below should be run from the shell within the Ubuntu app or from the same shell but in the Windows Terminal):
1
2
sudo apt update
sudo apt upgrade
Then we need to add the ROS package information to the sources list on our WSL system. To do this, run the below command:
1
sudo sh -c 'echo "deb http://packages.ros.org/ros/ubuntu $(lsb_release -sc) main" > /etc/apt/sources.list.d/ros-latest.list'
Now we need to setup the keys for these package repositories:
1
sudo apt-key adv --keyserver 'hkp://keyserver.ubuntu.com:80' --recv-key C1CF6E31E6BADE8868B172B4F42ED6FBAB17C654
NOTE: If you get some errors with the above command try substituting hkp://pgp.mit.edu:80.
Now we need to update the local list of available packages with these newly added ROS ones:
1
sudo apt update
Now we’re (finally) ready to install ROS. There’s a few options to choose from:
desktop-full: This includes everything; rqt, rviz, simulators, navigation, perception, you name it.desktop: This has most of the above but lacks the simulators, navigators, and perception.ros-base: This is just the basics for getting up and running with ROS. No GUI tools and only what you need to package, build, and communicate over the ROS stack.
My recommendation is to go with desktop-full unless you are super short on storage. It’ll take a bit more time for the initial install and take up more disk space, but you’re guaranteed to have most of the tools you need for anything you’d like to do. However, with all of these you can simply add more tools as you need them. Simply run apt-cache search ros-melodic to find which ones are available.
Once you’ve chosen the ROS installation you want to get, run the below command and substitute in your choice. I’ll do desktop-full here:
1
sudo apt install ros-melodic-desktop-full
Depending on your network speed, this might take a while to install.
ROS needs to be sourced each time you open a bash shell and so we can add it to the ~/.bashrc file using the below commands to add it to the file and then source the file (you can manually source ROS every time but that defeats the point of making this a dedicated ROS development environment):
1
2
echo "source /opt/ros/melodic/setup.bash" >> ~/.bashrc
source ~/.bashrc
A couple last things to do. For most ROS development you’ll want to be able to build your own packages. So we need a couple more packages in order to make this work. Install them with the following command:
1
sudo apt install python-rosdep python-rosinstall python-rosinstall-generator python-wstool build-essential
We also need to initialize the dependency manager for ROS. Simply run these three commands:
1
2
3
sudo apt install python-rosdep
sudo rosdep init
rosdep update
And now let’s test the whole setup by trying to launch Rviz:
1
roscore & rosrun rviz rviz
If it worked you should now see a window like the one below:
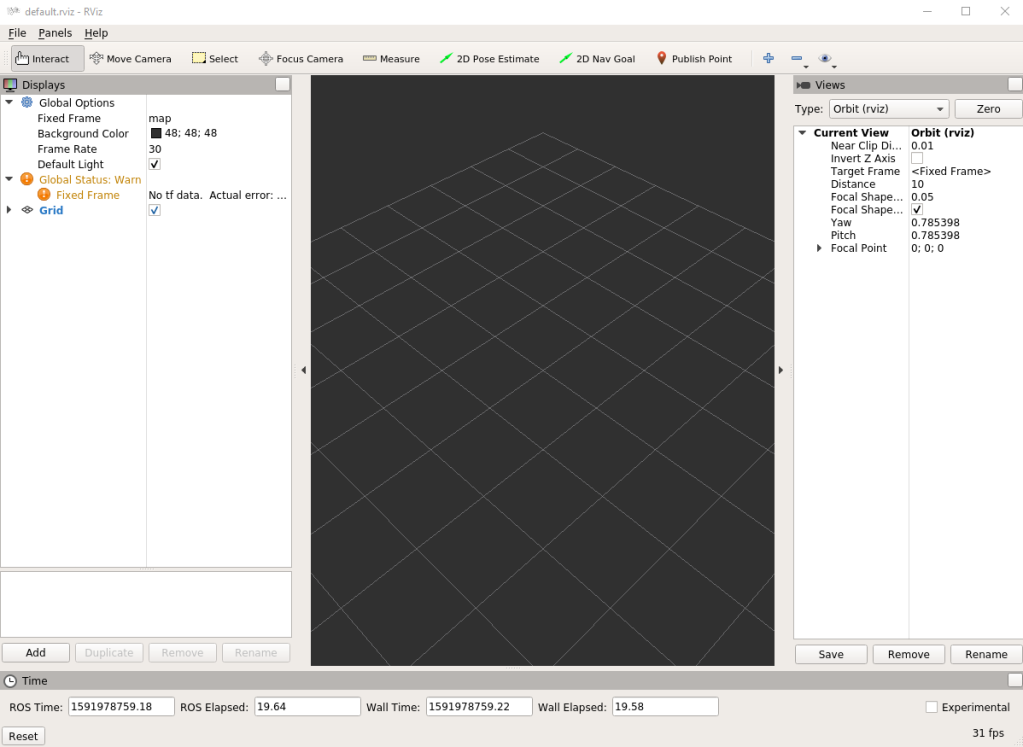
And you’re done! Welcome to ROS on Windows!
Conclusion
Though this post is pretty long, none of this is actually too hard to setup and can be done in a matter of a few minutes (not including install times). It offers a painless way to get started in ROS development on Windows for those who don’t want to run a VM or dual-boot their systems.
Once everything has been done above, you’re ready for some ROS development. Not everything will be supported in ROS with this setup (GPU support is coming in the future), but the basics are all there for most development needs. If you’re new to ROS, I’d suggest walking through the tutorials here to get a handle on things. At least go through the Beginner Level (you can just do one or the other of the C++ and Python ones) so that you have a good foundation to work off of.
I hope this is helpful to somebody and if you have any thoughts on how to improve this tutorial don’t hesitate to let me know with a comment.